During these times of isolation, we all face the challenge of remote and isolated working. One of the challenges we face is the differences between everyone’s technical setups, at home and at the office. Genymotion is an Android virtual devices platform that can be used both as an Android In the Cloud (AIC) and as a desktop software. Its unified technical stack and user experience ensures seamless collaboration between team members, and ability to work from anywhere in the world.
Most Genymotion users know the desktop version of Genymotion, but did you know that Genymotion is not just a brand with different products? It is actually a platform that allows users and organizations to centralize and share their Android virtualisation needs.
Your usual Android work environment
Even when respecting good practices and standardized environments, it is hard to control everyone’s variation and deviation. In the case of Android applications development and testing there are a couple of challenges. Let’s first identify the different environments that should be standardized:
- Local testing environment: virtual devices or real devices, on or connected to a developer’s environment (i.e: computer).
- Continuous Integration environment: continuous testing and more generally all forms of hook based process (like post commit hooks).
- QA environment: testing frameworks and tools that are executing tests written by QA engineers or generated by click and record tools in a virtual environment for checking before being pushed to CI environment
- Collaboration environment: specific use cases need to bring the standardized environments they use to their remote workers or customers: support center / help desk, Android app demo, training on Android apps
All these environments have in common the need for a unified, centralized distribution of the devices. While Genymotion cannot help with real devices yet, it can definitely solve most of the issues related to collaboration in a virtualized environment.
Now it’s time to see how.
Your standard environment with Genymotion Cloud
First step is to go to Genymotion Cloud. Make sure you created your free account. The free account comes with 60 minutes of virtualisation, which is more than enough to test everything we’ve suggested in that article!
Device creation
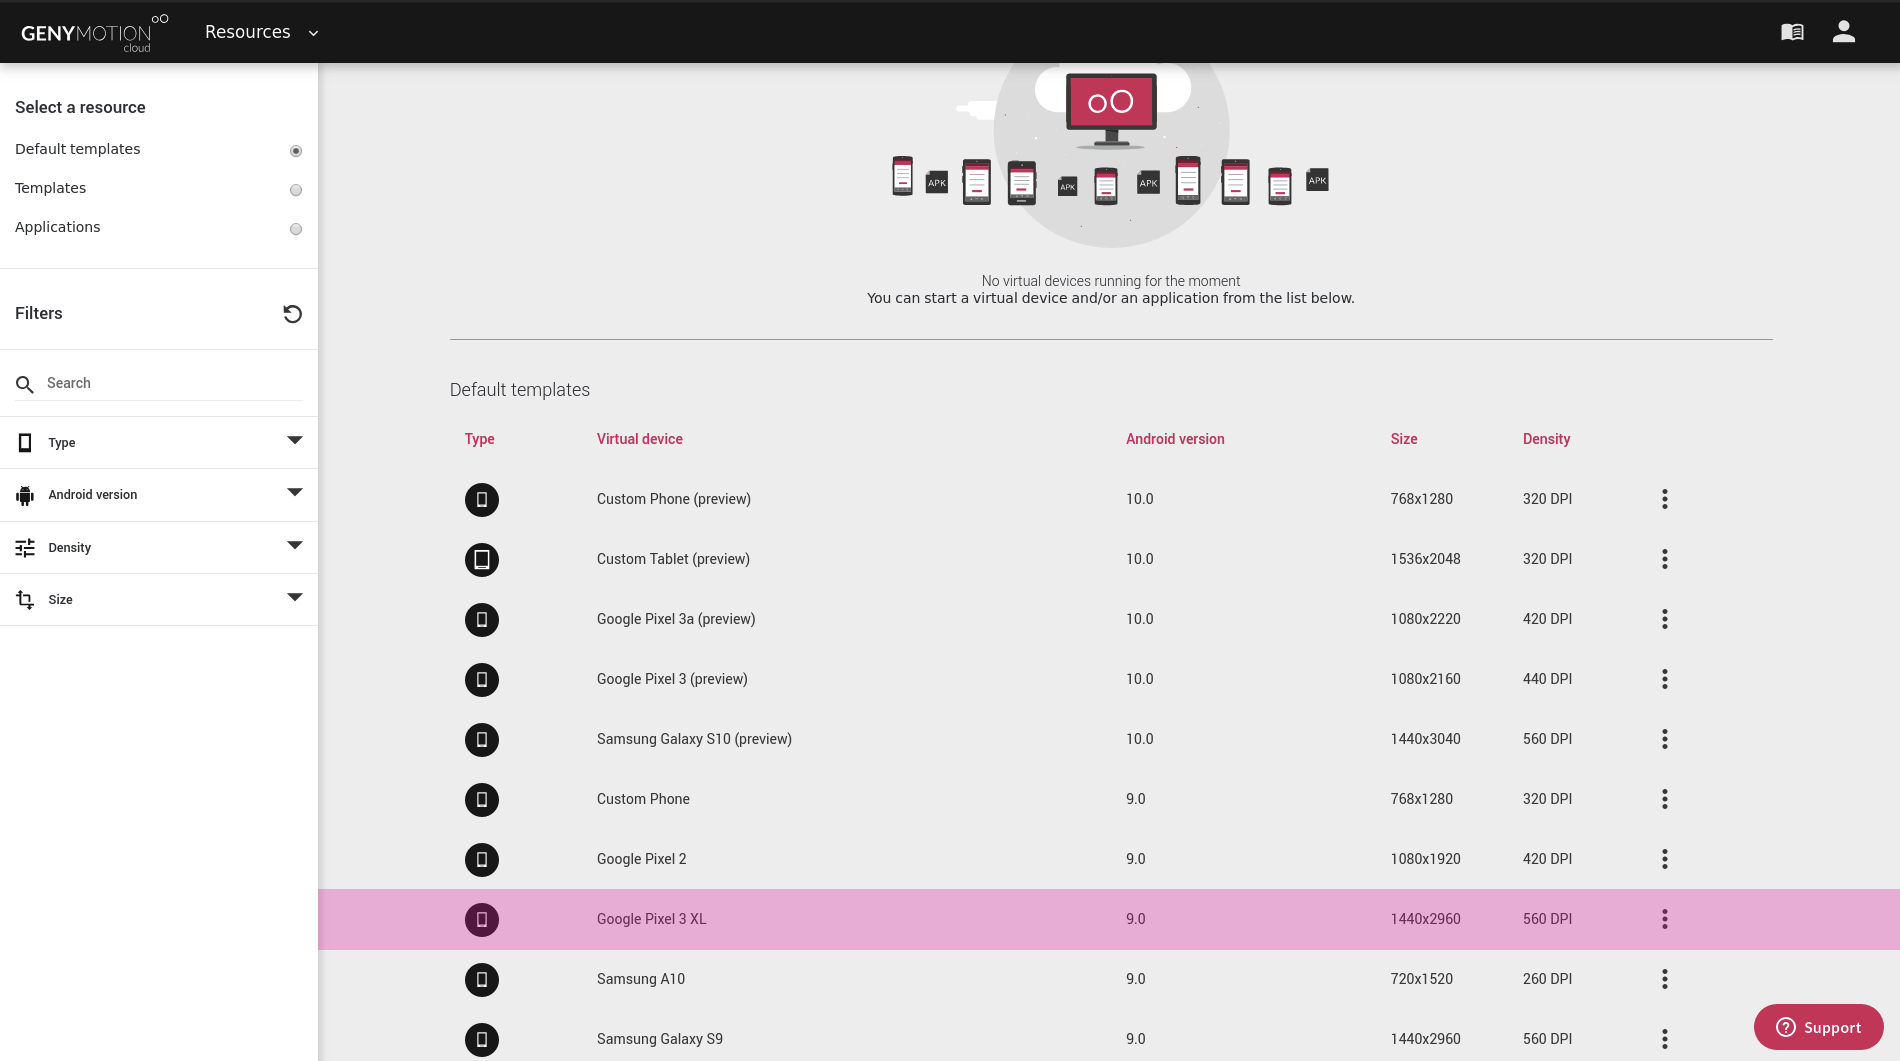
When you log in, you are taken to the “Default templates” section of the cloud app. This is where you will find all the default templates for new virtual devices. The section you are really looking for is the “Templates” one. This is where your own virtual devices templates are organized.
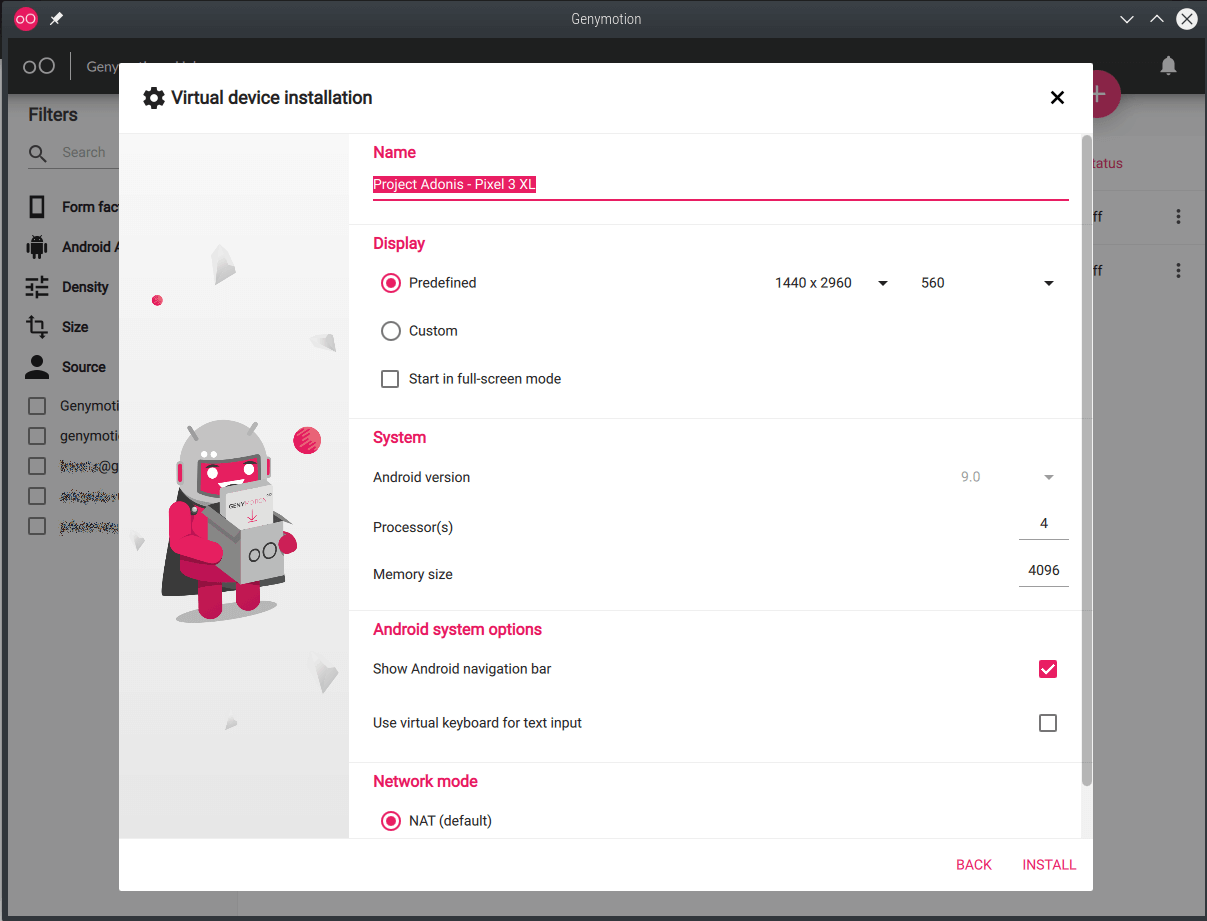
Let’s see how we do that. First take a default template, I’ll choose a Google Pixel 3 XL on Android 9.
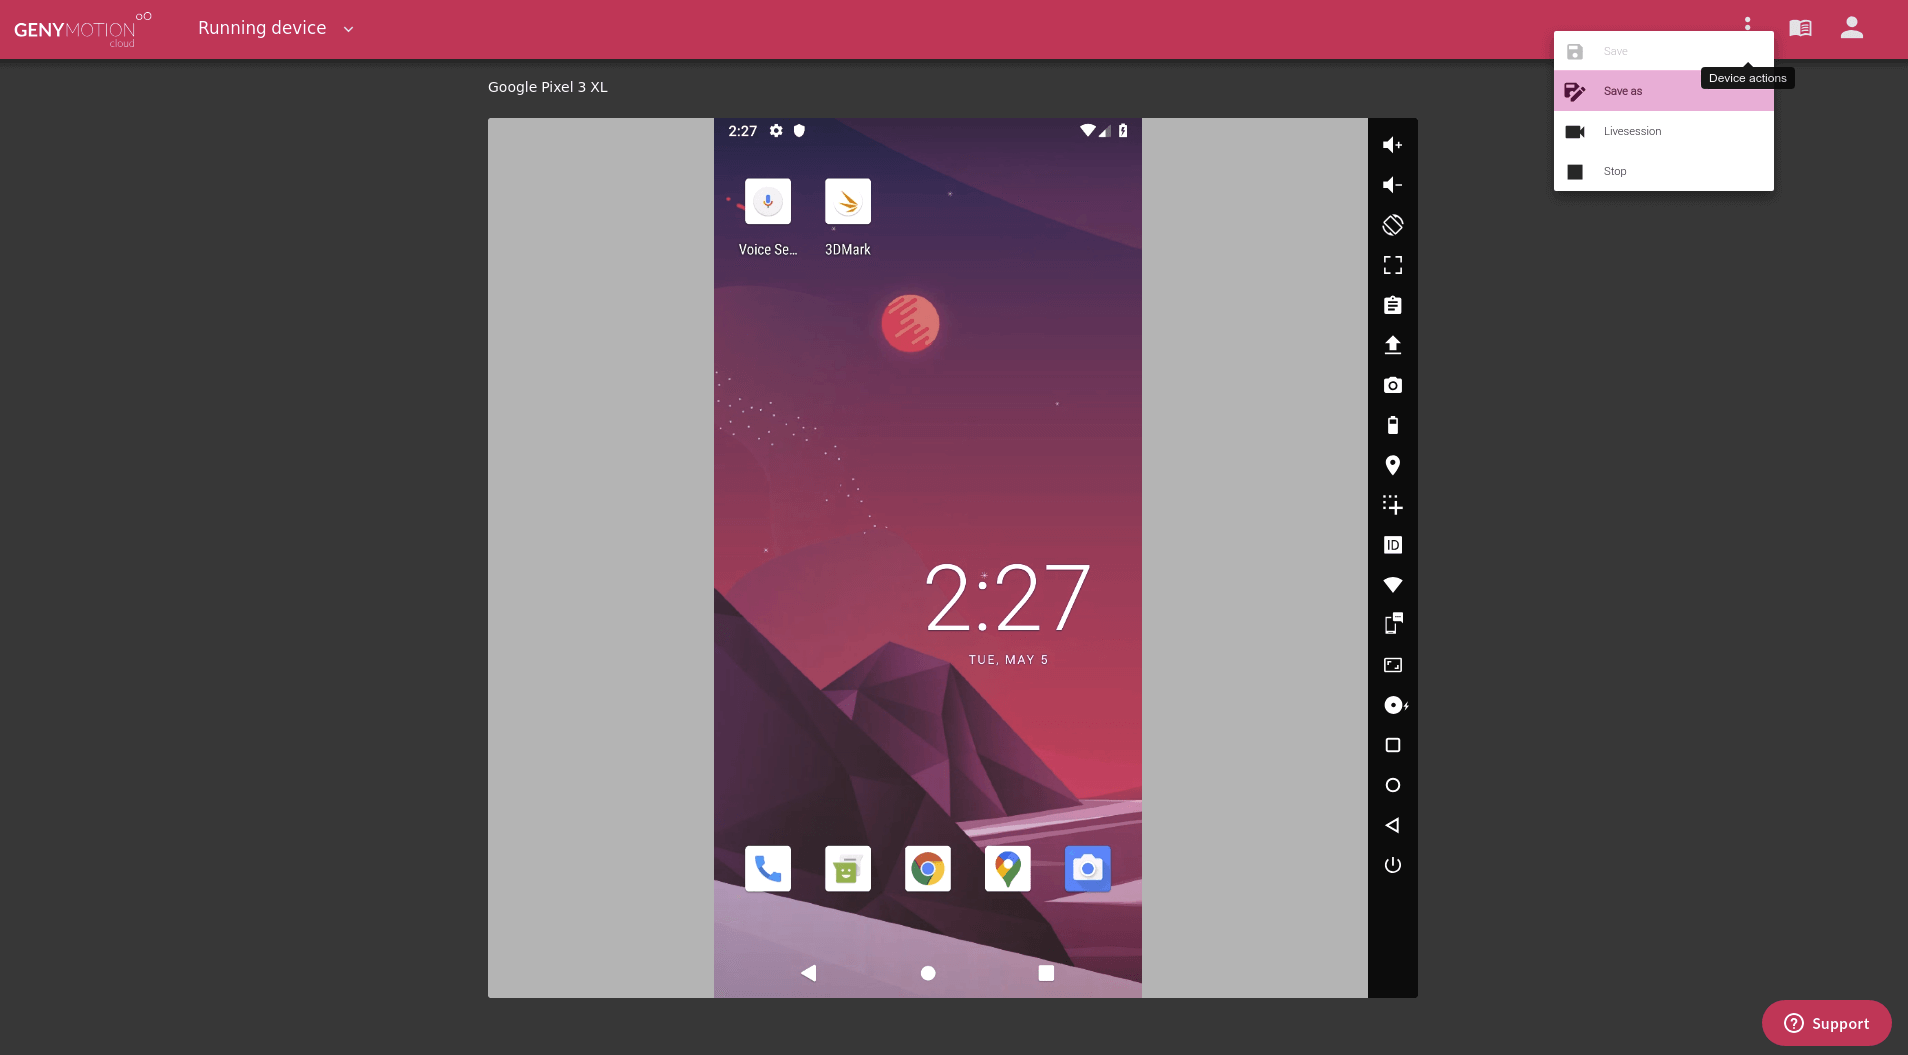
Spin that device by clicking the contextual menu (the 3 dots) and “Start”.

Once it’s booted, you can install apps or upload files by dragging and dropping them on the virtual device, you can choose to install the Open GApps through our dedicated widget, etc. In short: you can prepare the device for the task ahead and make it ready to share.
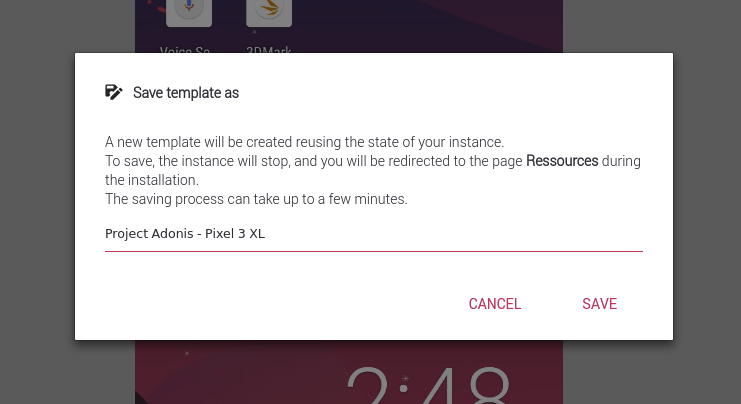
When you are satisfied with your virtual device, save it! Use the “Save as” menu entry from the contextual menu.
Give it a name allowing easy identification from your team.
From here, we have a couple of options to share our virtual device.
Live sharing
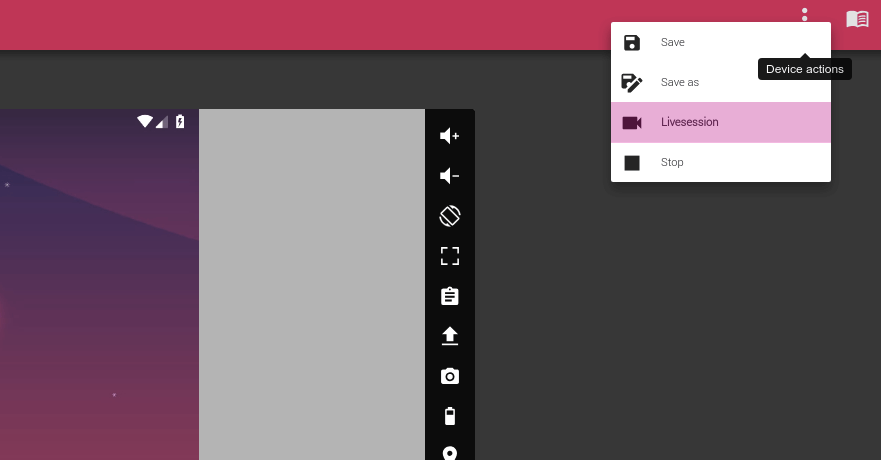
Starting with the most obvious one: live sharing your virtual device. This feature is suitable for demo (at the end of a sprint), live debugging or brainstorming, for support centers, etc. It allows you to immediately share a web access to your virtual device through a live session. To start a live session click on the “live session” button in the contextual menu.
When in a live session the UI changes and lets you invite people across (or outside of) your organisation. All of them will be able to interact with your virtual device, making it a great tool for sharing and reviewing projects. It is also extremely helpful with support centers and training centers.
To stop your live session just click the “stop” button.
Template sharing
Template sharing is the swiss army knife of collaboration.
Sharing a template is extremely simple as it is built into the platform. Once a virtual device is created use the contextual menu to share it with team members.

The sharing screen allows you to invite others to use your virtual device. Once invited they can access the VD through a dedicated link automatically sent by the platform. A word of advice though: be careful with sharing the link to a device while on a metered plan as the shared resources count as your usage (i.e eat your minutes).
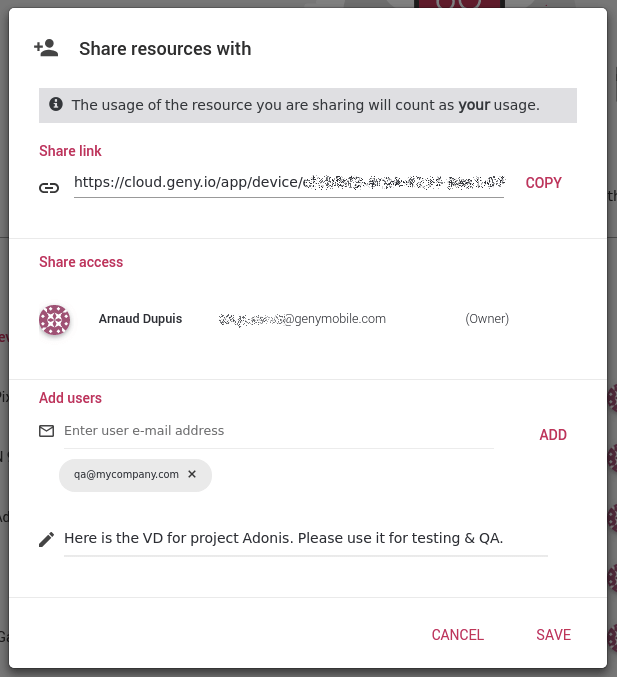
You can think of a VD on Genymotion Cloud as a Google Drive document: it’s yours but you can share it with others. The owner is the only one that can save changes into the template.
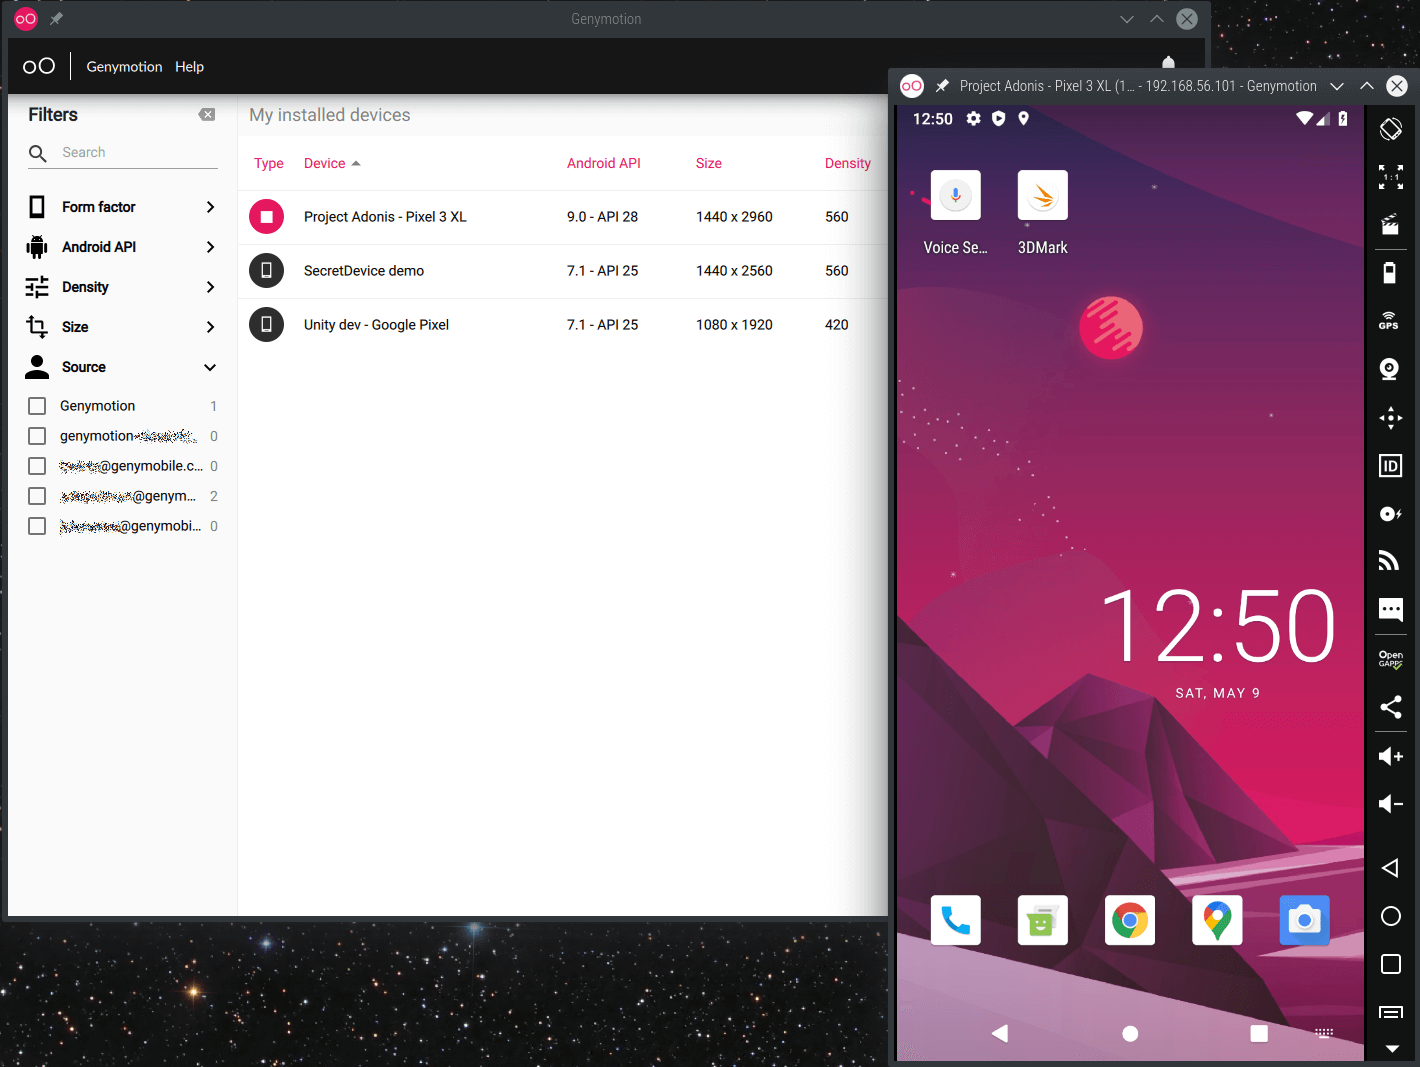
You might wonder how is that related to Genymotion, the desktop application. Well, your freshly shared template is immediately available in the desktop application to you and the people you shared it with!
To access it simply click the device creation button (big white plus sign in a pink circle), and look for the sharing source.

From here, just select the desired template and click Next. The template is obviously fully customizable.
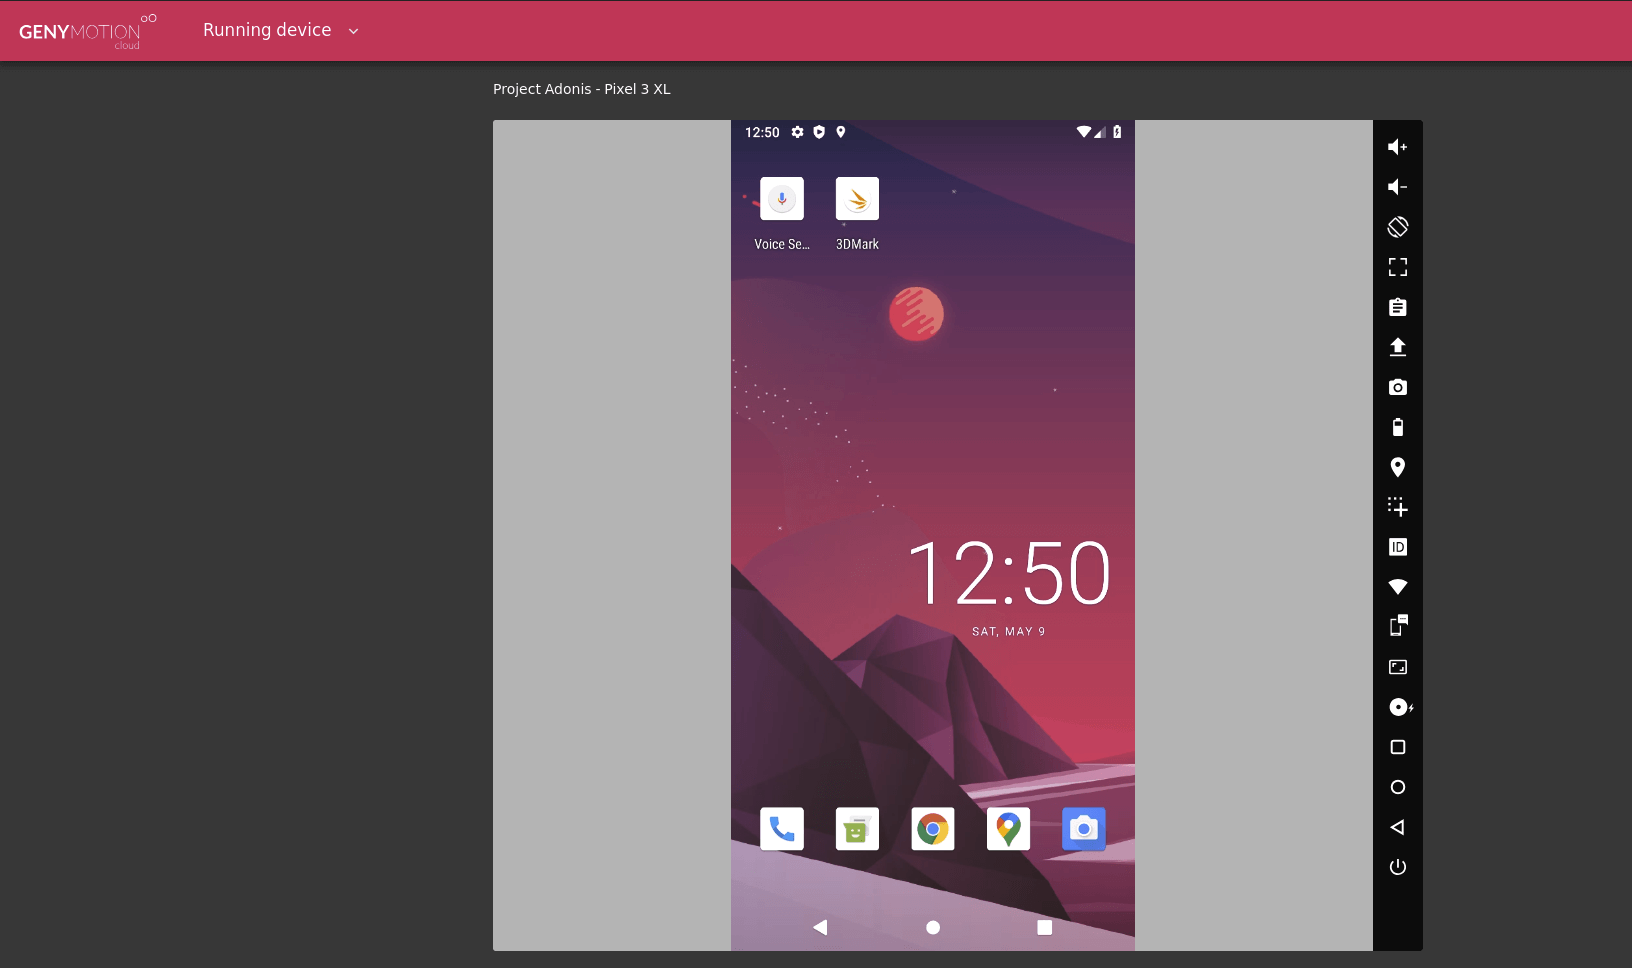
Boot up the device and voilà! You have exactly the same device both in the Cloud:
And locally:
Of course all of these devices can be interacted with through the gmsaas command line tools. Their usage is similar and they allow for the same kind of operations.
They allow for simple sharing and integration with all sorts of other platforms or tools, including:
– Most popular IDEs: Android Studio, Unity Editor, etc.
– Continuous Integration tools: Terraform, CircleCI, Bitrise, etc.
– Automation testing frameworks: Appium, Espresso, etc.
– Docker
Moreover thanks to our own implementation of ADBcloud, your cloud instances can access your protected / private infrastructure in a fast and secure way. This allows for development and testing to take place in your qualification environment without exposing anything on the Internet or compromising with security.
Conclusion
The frightening situation we are in is a cruel reminder that we thrive as a specy when we collaborate with each other.
On our small scale the Genymotion platform can help Android teams better collaborate in a unified environment. It also allows each stakeholder to have an answer to isolation whatever the quality of the local internet with the ability to go online or offline to use Android virtual devices.
Our vast choice of plans, free trials and pay-as-you-go (PAYG) options also helps evaluate the best solution for you. Feel free to contact our sales reps for more information on Genymotion.

