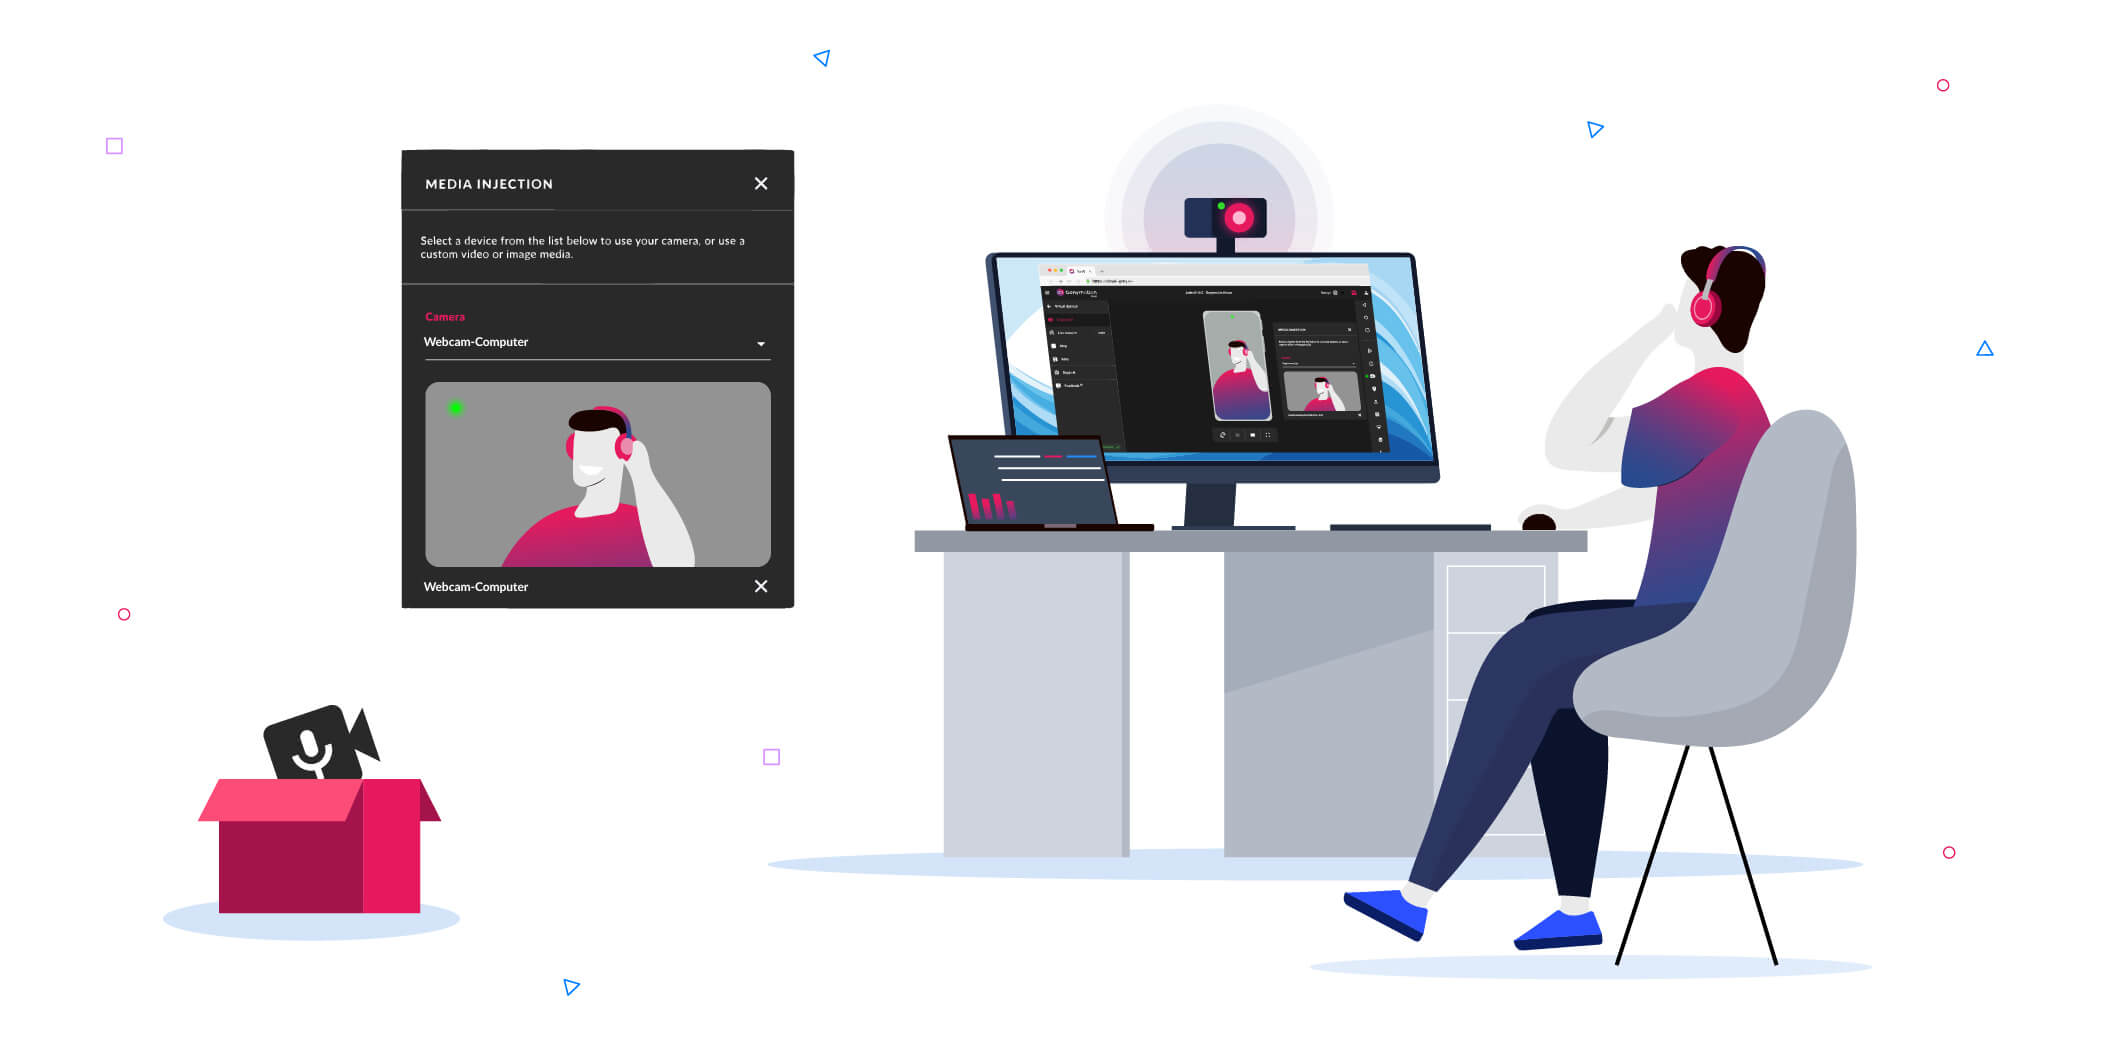
Testing camera-dependent features on cloud-based virtual devices has always been a bit of a challenge. Whether your application requires scanning a QR code, capturing a live photo for KYC verification, or testing video streaming capabilities, simulating these real-world camera inputs in the cloud is mandatory for thorough testing.
With this in mind, we are extremely pleased to introduce the latest addition to our toolset: the Media Injection widget ; now officially live on Genymotion SaaS!
What is the Media Injection widget?
Until now, manipulating the camera feed on virtual cloud devices often required complex tweaks and workarounds. We wanted to make this process as seamless and flexible as possible for your workflows.
Our new Media Injection widget gives you two powerful ways to feed the camera of your Genymotion SaaS virtual devices:
- Upload media files: Instantly inject custom images or video files directly from your computer.
- Stream live feed: Connect and stream directly from your own physical host webcam straight into the virtual device in real-time.
Accessible right from your web browser’s device interface, this feature empowers developers, QA engineers, and security researchers to mock or live-stream camera inputs in just a few clicks.
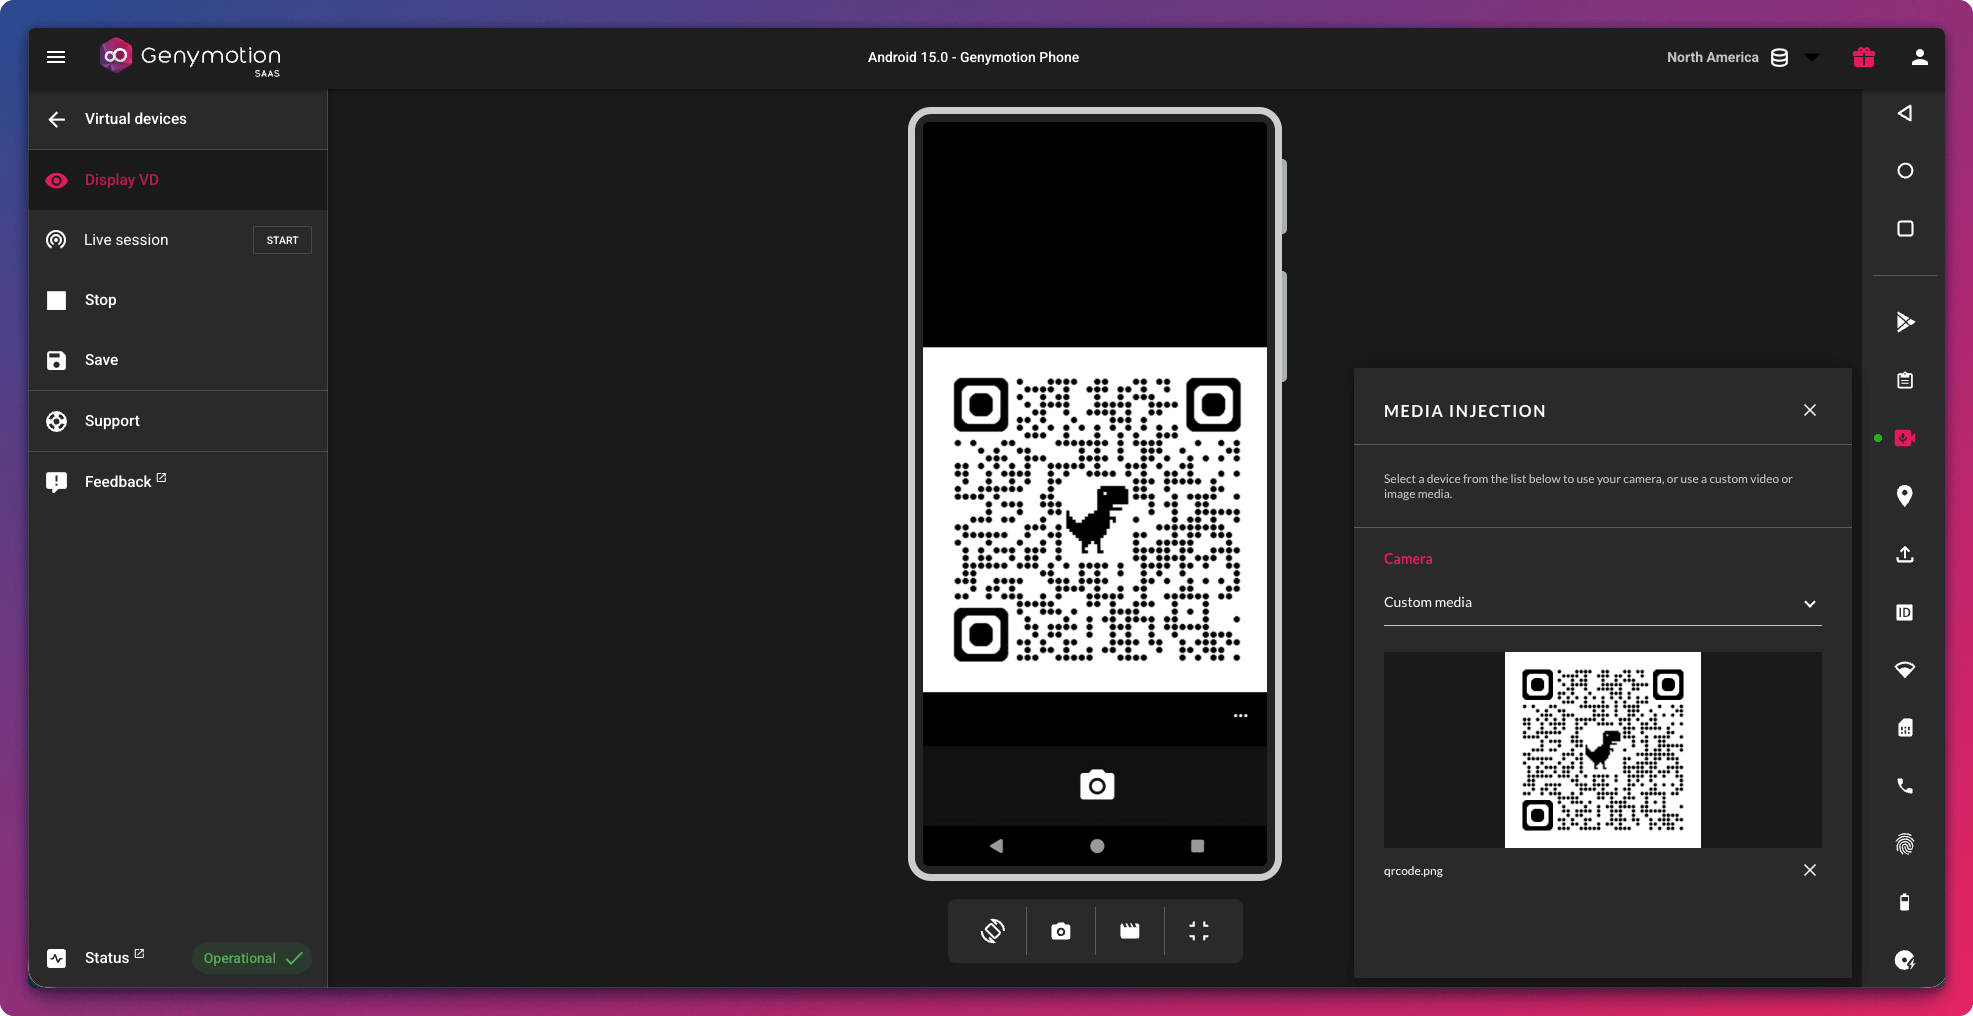
How to get started
Using the new widget is as easy as it sounds:
- Launch a virtual device on Genymotion SaaS.
- Locate the new Media Injection icon in the interactive right-hand toolbar.
- Choose your input: Choose a media from your computer or use your webcam (make sure to grant your browser permission!).
- Open your Android app and trigger the camera, your uploaded media or live webcam feed will instantly appear as the live camera!
Try it out today!
Our mission is to provide you with the most powerful, flexible, and reliable tools to build, test, and debug Android apps in the cloud. Integrating these capabilities directly into your browser workspace is another big step toward maximizing your development efficiency.
Ready to see it in action? Log in to your Genymotion SaaS account and give the new widget a spin! For more technical details and supported media formats, be sure to check out our documentation.
As always, if you have any questions or feedback, feel free to reach out to our support team or drop a message to our community.
Happy testing! 🚀

